Pink Summer of Tech Website — The UI Case Study.
Here's a little disclaimer before you get into reading my article. My main purpose in documenting this process and writing this article is to show how to speed up your process and quality of work as a designer especially in "minor" project situations (with little to no collaboration), where you are either the sole designer or lead designer of that project.
4 hours
UI/UX Designer

No one wants to spend long hours and frustrating periods where you might be stuck in a creative block and little to no good ideas come in, believe me, more people than you think have been there. Read this article till the end and learn my step-by-step process to design projects in a jiffy if you have a project to design, or even if you have to do other UX research methods to validate your ideas, you can still learn a lot from these steps and approach that I take when designing for smaller projects. I totally recommend the methods in this article to improve your speed in designing, and not trade the quality of your work for it. Ready? LG!🚀
Design Brief
"Design a website for Pink Summer of Tech, an affiliate of GDG Enugu. You can make it a one-page website", said the client.
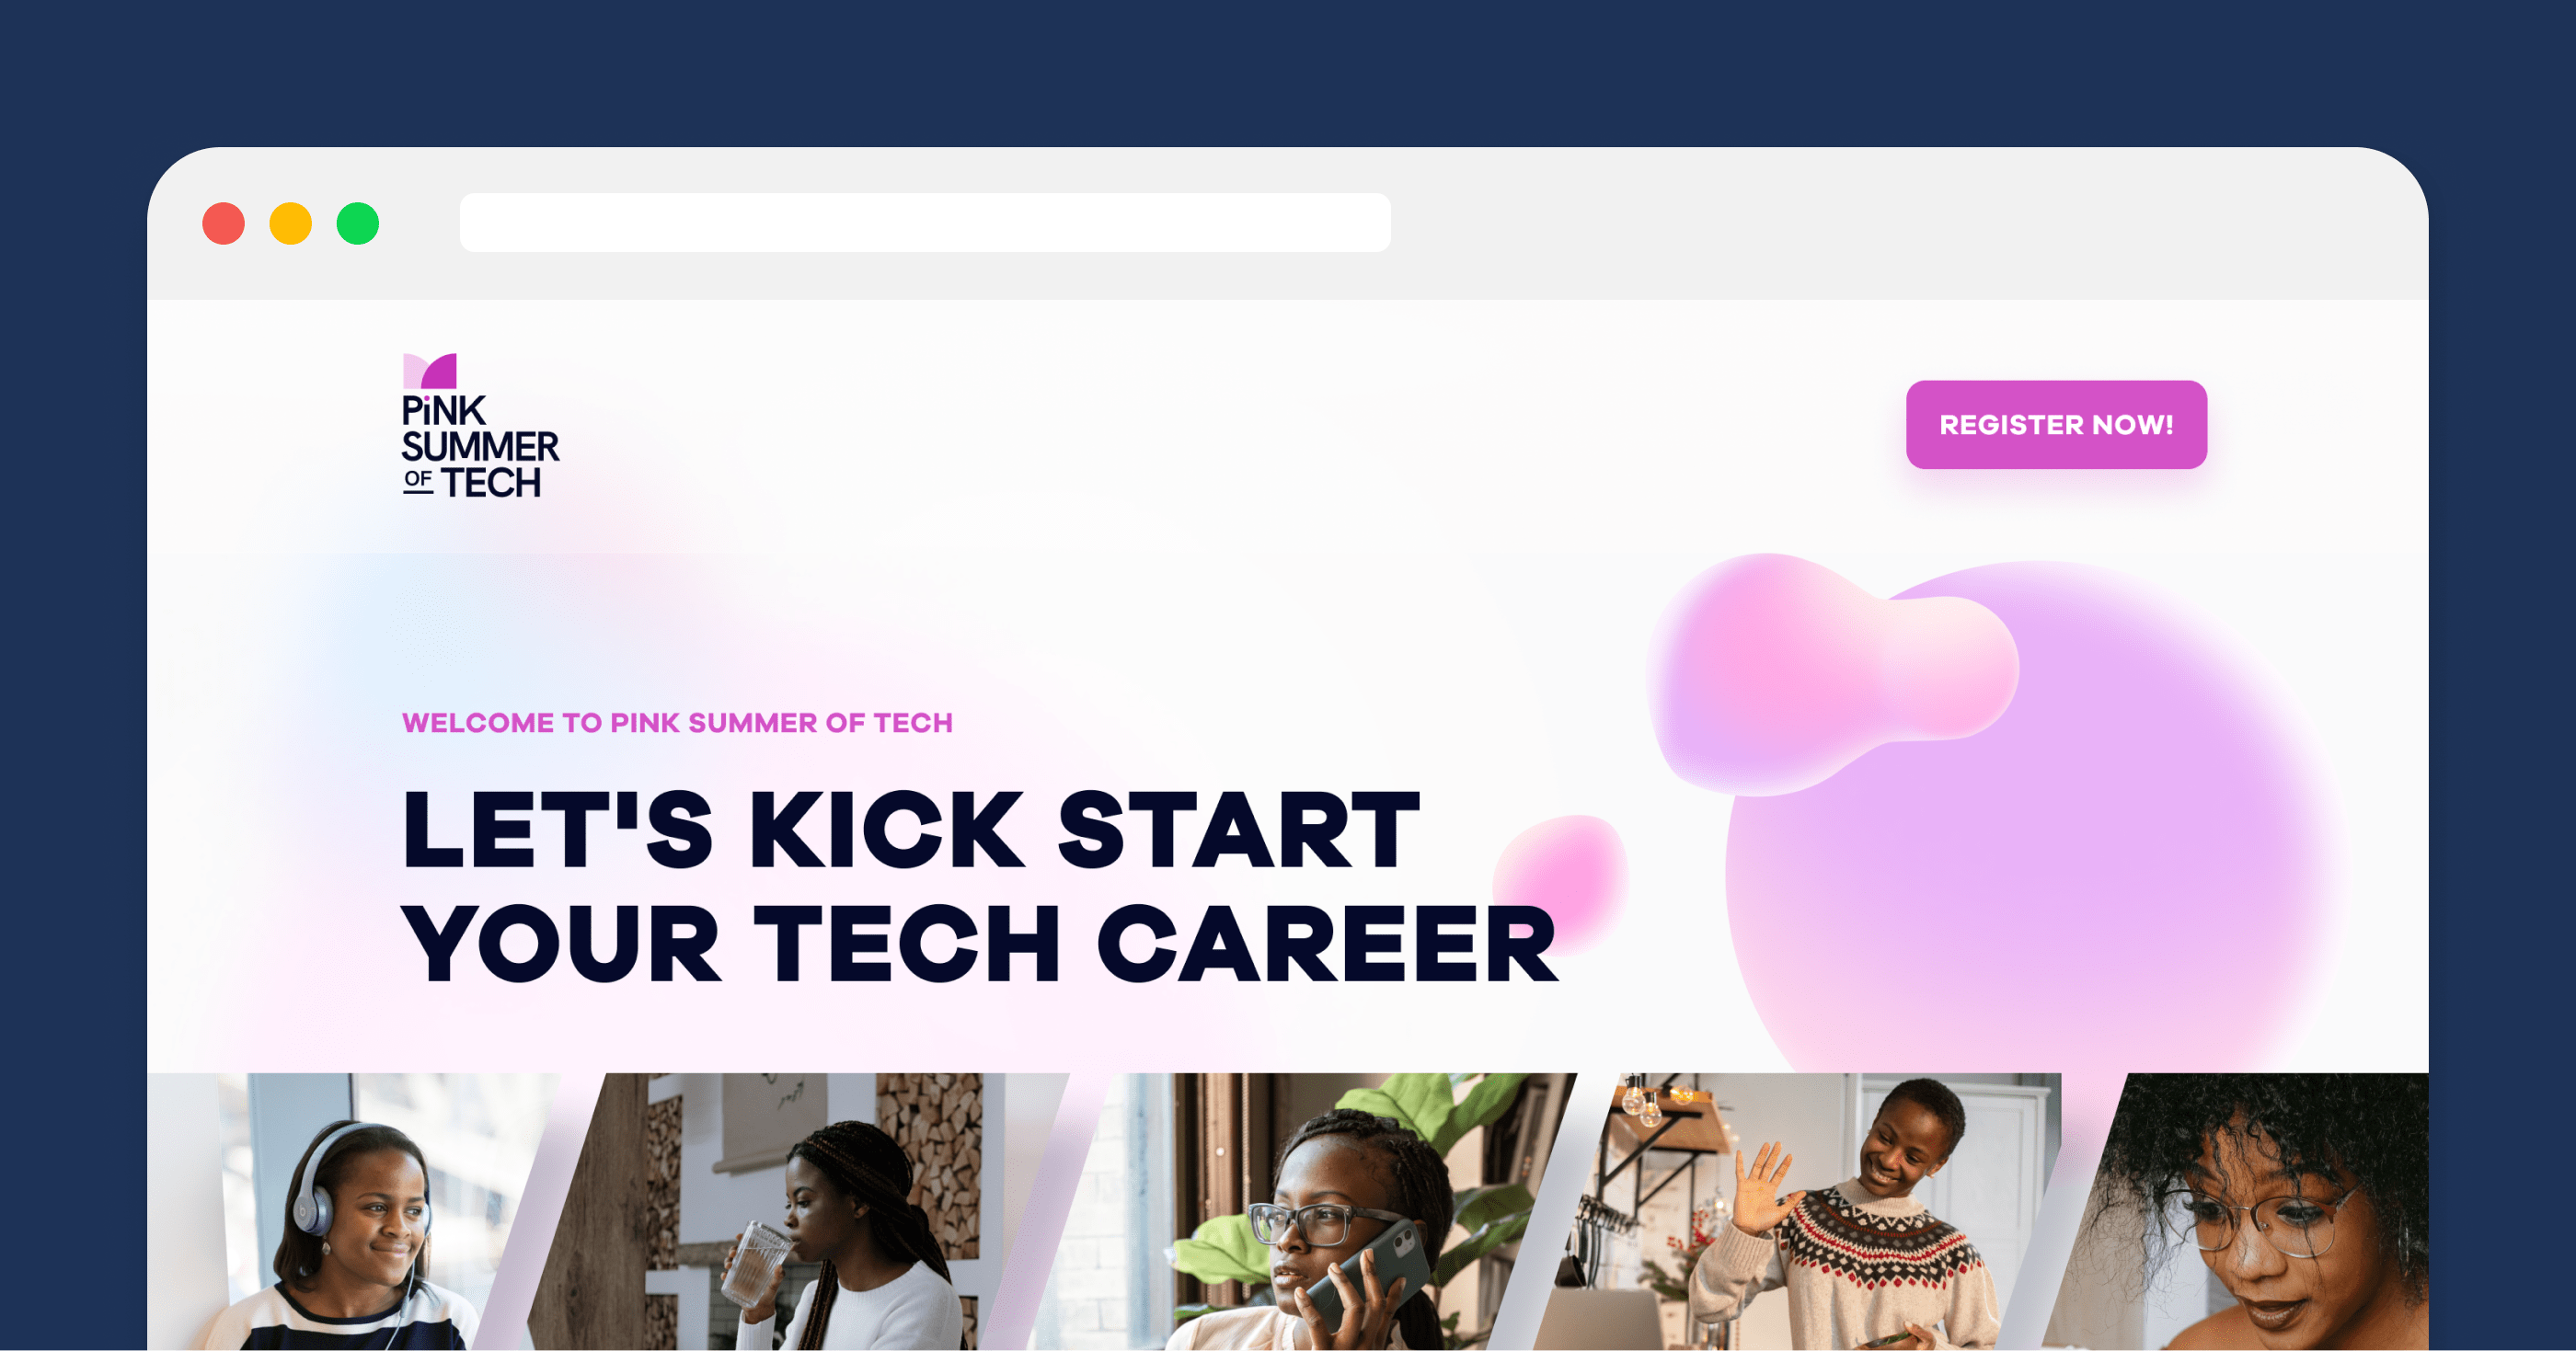
My Results
My design tool was Figma. The brief above was literally what I had to get going and design the website. Imagine a scenario like this, below are the steps to what I did. You've had a situation like this where there is no detailed design brief yeah? you can take these steps too:
Step 1: (Content Inspiration/Strategy)
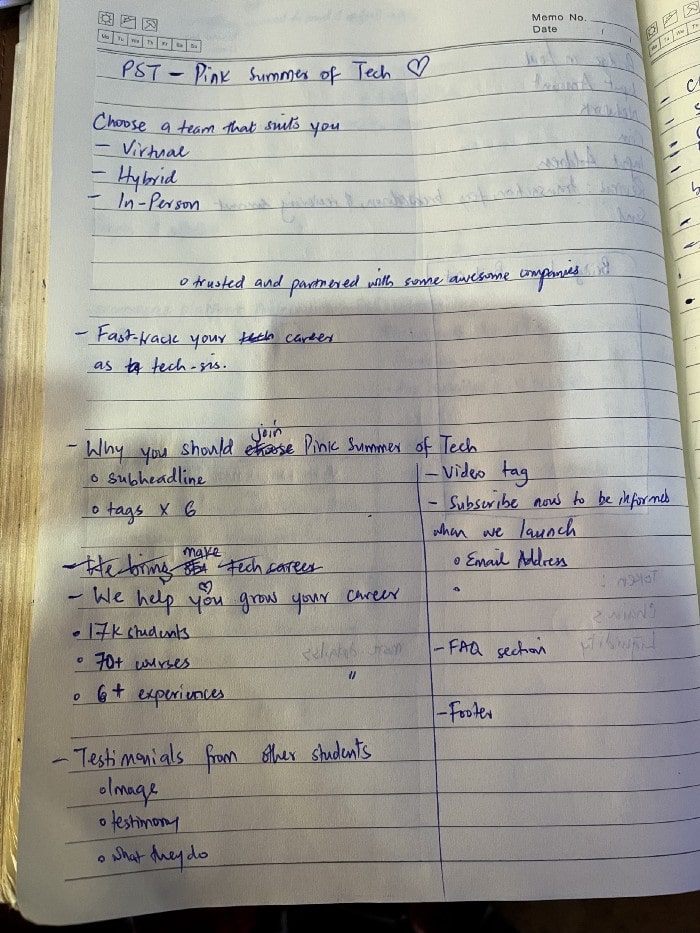
My first step in this approach was to write out content/text and wrote them down on my notepad. This is a design method called the content-first approach. How I did this was, to research and write out all the possible content that would span across the website. I arranged them into sections and made short notes to remind me if I needed to add some key elements like the header, the sections, and the footer while including where you would need a video, an FAQ fold, and so on. You can as well research similar products or websites and get the inspiration you need from them.
Remember, having to write this down, would save you time. I also tried to add some humor to the content "we pinky swear it" haha.
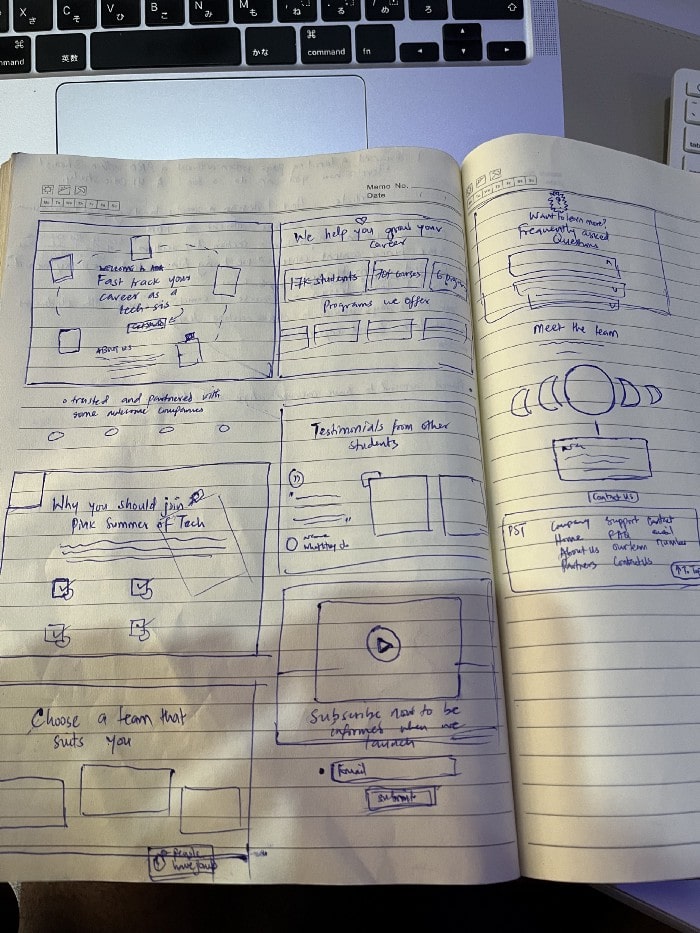
Step 2: (Sketches and Layout Explorations)
This step is your typical low-fidelity wireframing. I headed over to websites that I gain visual inspiration from, eg. Pinterest, Dribbble, etc. I made a few multiple variations during this phase of sketches. I sketched the sections and added the content for the headings and highlights, and gradually formed ideas so that the main design on Figma would be straightforward and rapid iterations. For this step, I'd always advise checking existing designs from your inspiration sites and not during the high-fidelity stage.
Step 3: (Created a mood board)
This is the stage where a lot of designers end up opening multiple tabs on their browsers 😂 Avoid this, please! You might end up slowing your device's performance. I use mood boards to steal like an artist from other people's designs, usually stealing from plenty of designs at the same time. I could steal ideas like the theme style, the typography style, the colors used, and mostly the style. I created a new page, named it "mood board" and still around my inspiration world, I copy and paste other people's designs for easy reference. You could create mood boards however way that pleases you or you are more familiar with them.
After this, I chose typography and icon packs from the Figma community. I created new Figma pages and move the icon pack there, inside the design file.
Remember, having to write this down, would save you time. I also tried to add some humor to the content "we pinky swear it" haha.
Step 4: (Mid-fidelity wireframing)
So the content is ready, followed by the low-fidelity sketches, next is the low-fidelity wireframing using Figma. Next, tune in to some of your best music. I opened Spotify (my favorite music player) and started playing my music,
then jumped into Figma with my notepad by my side. I'm a sucker for The Chainsmokers' music so here's the playlist I was glued to (link)
The medium-fidelity wireframe took a longer time than expected, but the good part of this is that you can easily translate to high-fidelity if the medium-fidelity is precise. This step helps a lot in adding the layouts you explored and concepts in order.

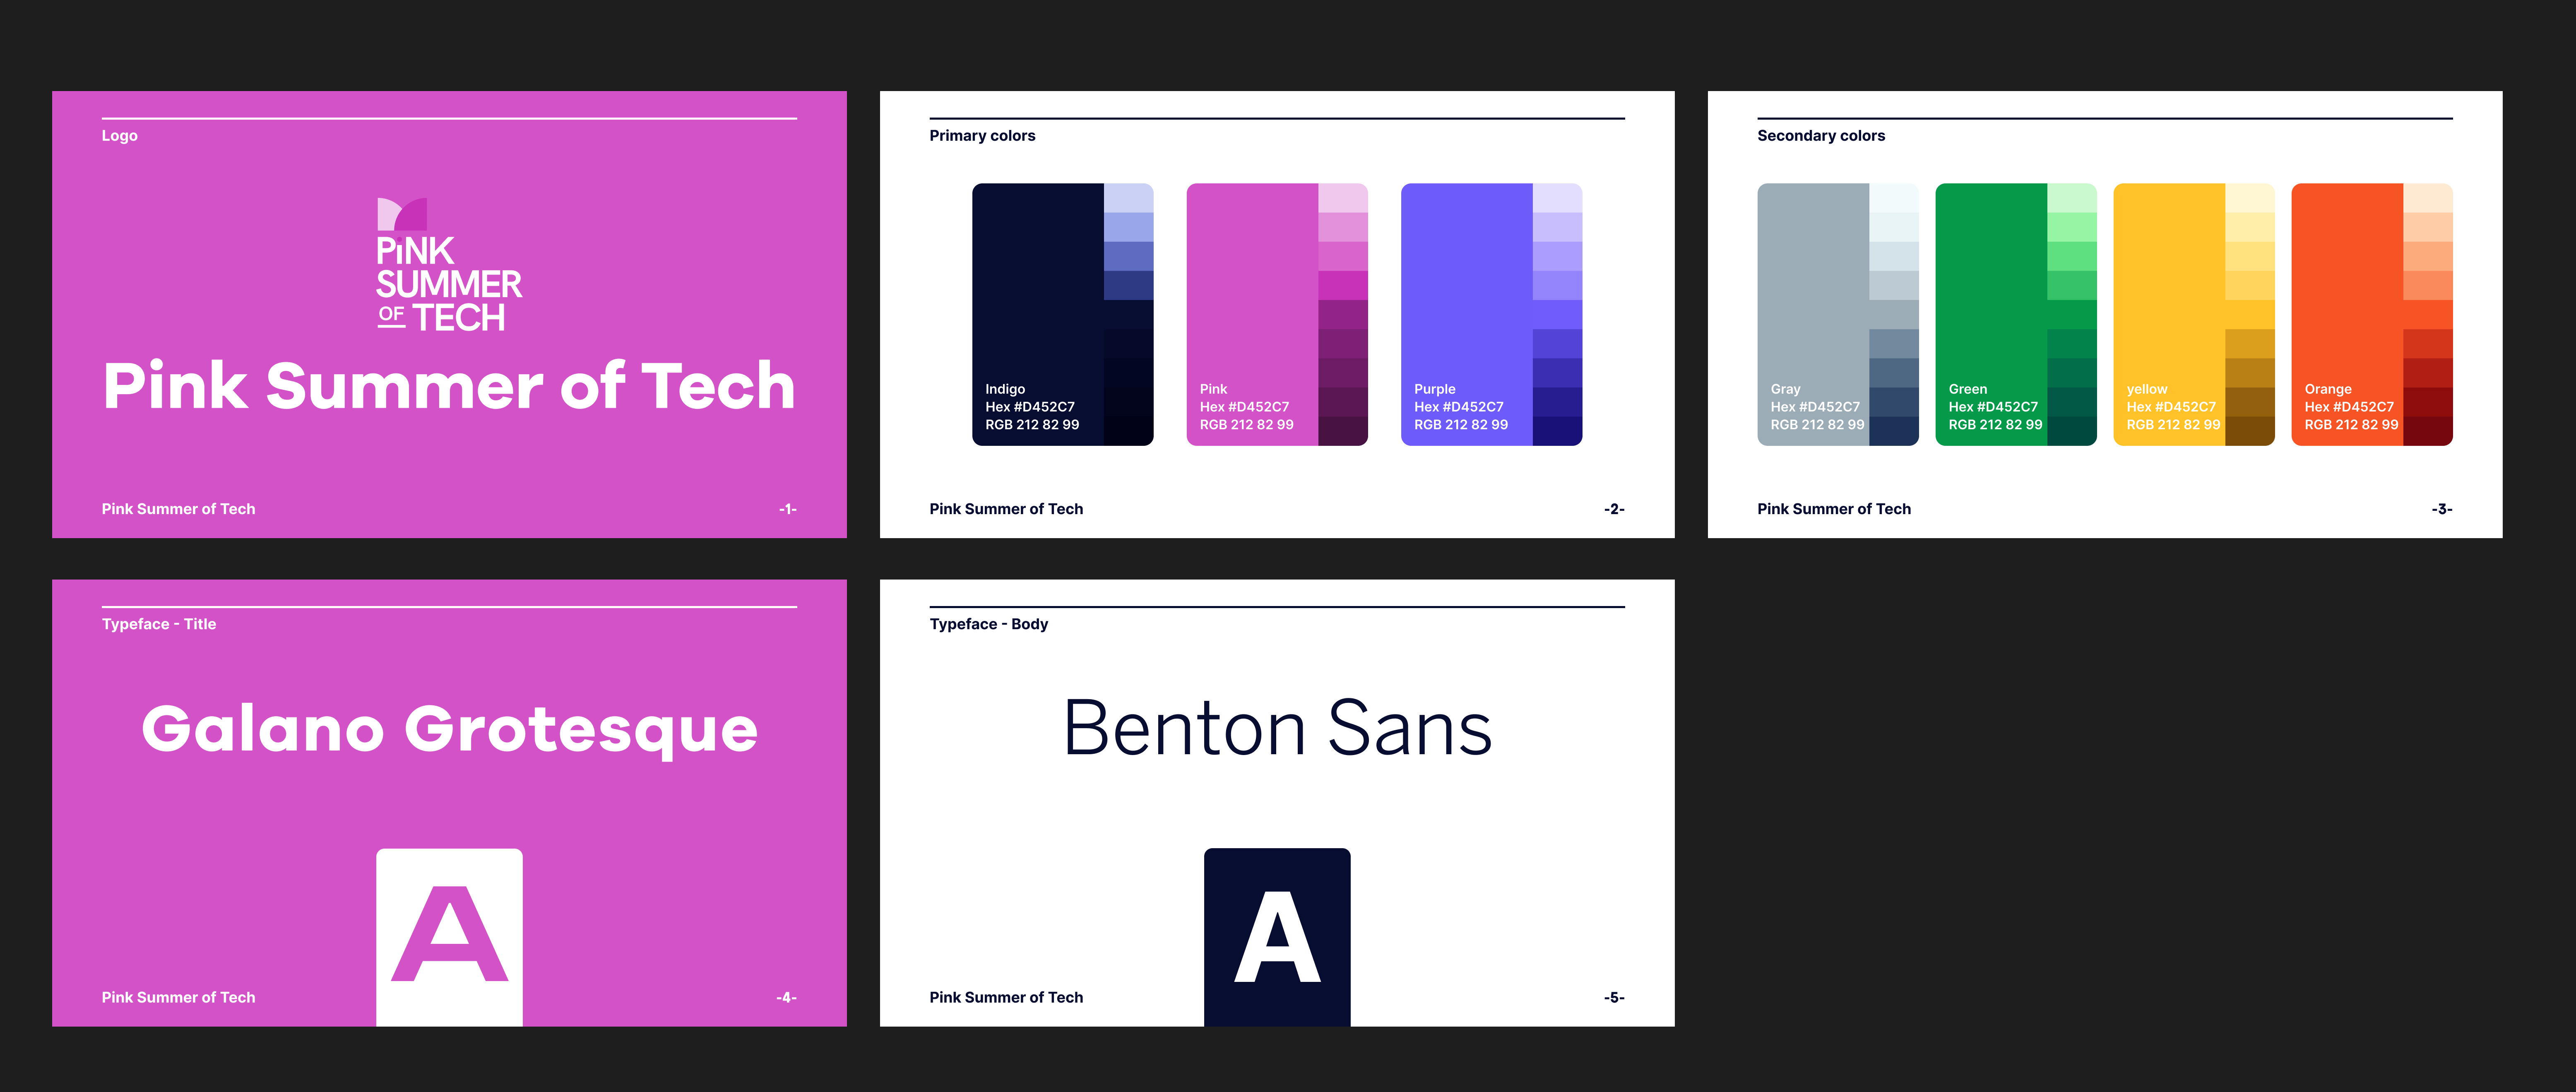
Step 5: (Designed a mini style guide)
This was something super quick. Basically, I chose my primary and secondary colors for the design. I made their different shades for use throughout the Hifi design. I also started naming the color styles on Figma.
Step 6: (Final iterations)
This is the final product and has to be handled with care when designing. I loved to add a bubbly feel and 3D theme with a nice, subtle and playful vibe to the entire web page design. In this phase, I paid more attention to the spacing (using the 8pt grid), the use of colors, the contrast, and much more key design principles. After which I jumped into websites like freepik, flaticons, etc. to play around with more assets and add them to the design. Then, I designed different breakpoints (responsiveness). So here's the trick, in this phase, you definitely do not have to worry about many ideas, just add colors and play around with assets that you can come across and create brilliance. You've already done the hard work in earlier steps which breaks down your confusion about the project and in turn, speeds up your design project.

Conclusion: (Still in doubt? I doubt that)
This is the final product and has to be handled with care when designing. I loved to add a bubbly feel and 3D theme with a nice, subtle and playful vibe to the entire web page design. In this phase, I paid more attention to the spacing (using the 8pt grid), the use of colors, the contrast, and much more key design principles. After which I jumped into websites like freepik, flaticons, etc. to play around with more assets and add them to the design. Then, I designed different breakpoints (responsiveness). So here's the trick, in this phase, you definitely do not have to worry about many ideas, just add colors and play around with assets that you can come across and create brilliance. You've already done the hard work in earlier steps which breaks down your confusion about the project and in turn, speeds up your design project.
Next Project King Cards
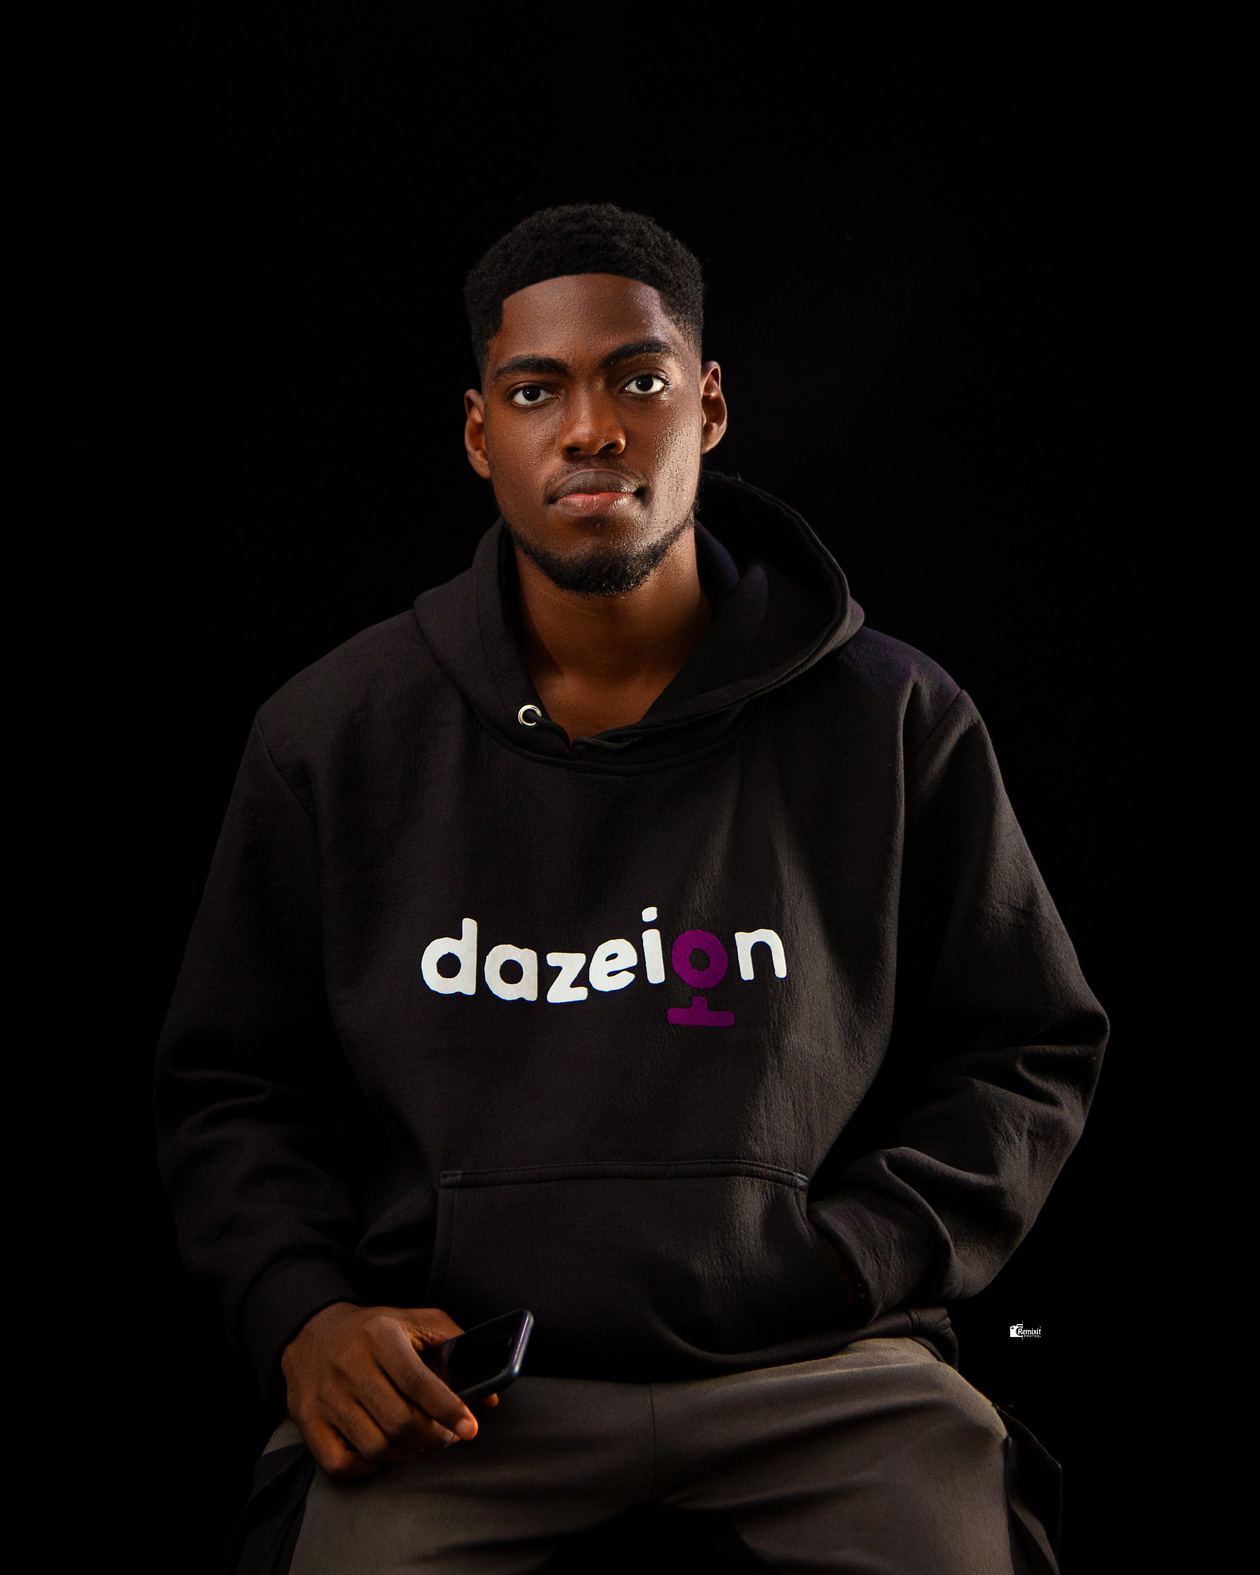
Who is Dazeign?
It's a brand name that I created for myself, absolutely nothing crazy here (or everything actually). Well, dazeign (pronounced as /dɪˈzʌɪn/) is the mix of my name (daze) and the word (design). Capeesh?😜
I am a Product Designer that specializes in using human-centred designs to create digital products and services that are intuitive, interactive, accessible and visually delightful. I have several years of experience working on different sectors like fintech, health, ecommerce and much more. I am also good with people & very easy to work with.
Currently, I work at Linum Labs with an amazing team and bring UX solutions to alot of Web3 products and upcoming blockchain projects. Asides that, I am putting my energy towards making the future of DAOs, NFTs, DeFi-products and other Blockchain products to be as accessible as possible.
When I'm not behind my screens, you can catch me playing basketball, video games, in the gym, listening to podcasts or music, or travelling.😌